Tutorial
Create your first script
To begin, tap the floating action button (FAB) on the Home screen. This opens the 'Create New Script' dialog.

Most pages in this setup wizard are for optional metadata, which is helpful later when you use AI to generate content. To navigate between pages of the wizard, use the arrow at the trailing edge of the text fields, or simply swipe the page. To complete the script creation process, press 'Create' button on the last page of the wizard. This will open the 'Script Details' page of the newly created script.
Login
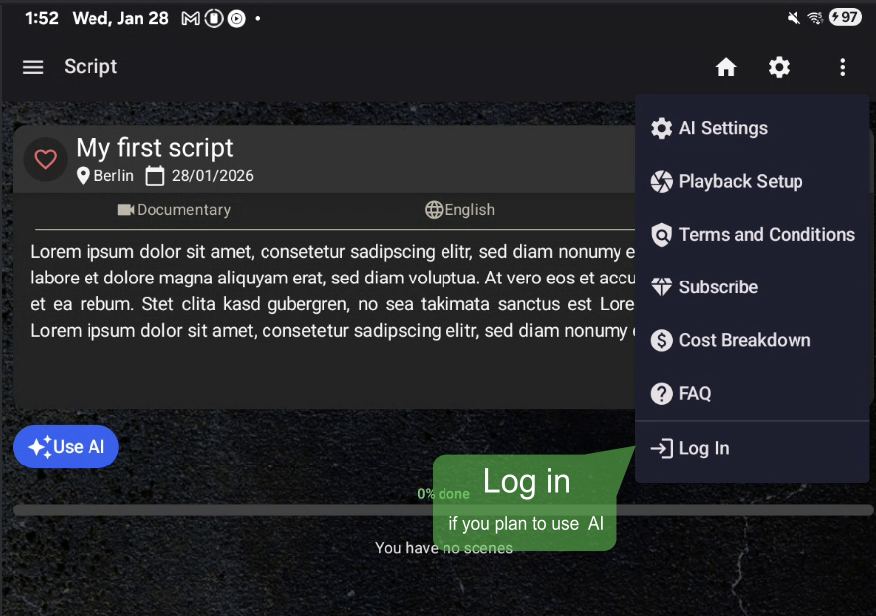
Login is required only if you plan to use AI features for generating or reworking your script, if you are creating everything manually, you can skip this step.
AI Settings
To get the best result from the AI, provide some context in the 'About you' field. This helps the AI to match your style and expertise. You can manually type any text into the text field or use our tips.
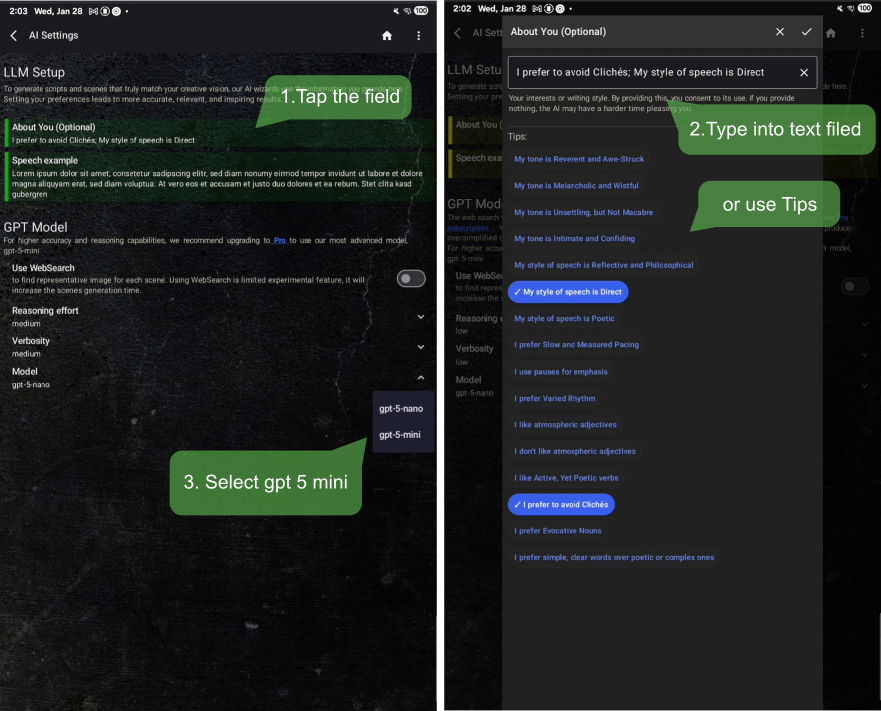
We recommend using 'gpt5-mini' model for the good balance of speed and quality, which is available for Pro users.
Use AI to generate scenes
Return to the 'Script Details' page and tap the 'Use AI' button to have the AI generate your scene list automatically. You can continue working in the app while scenes are being generated.
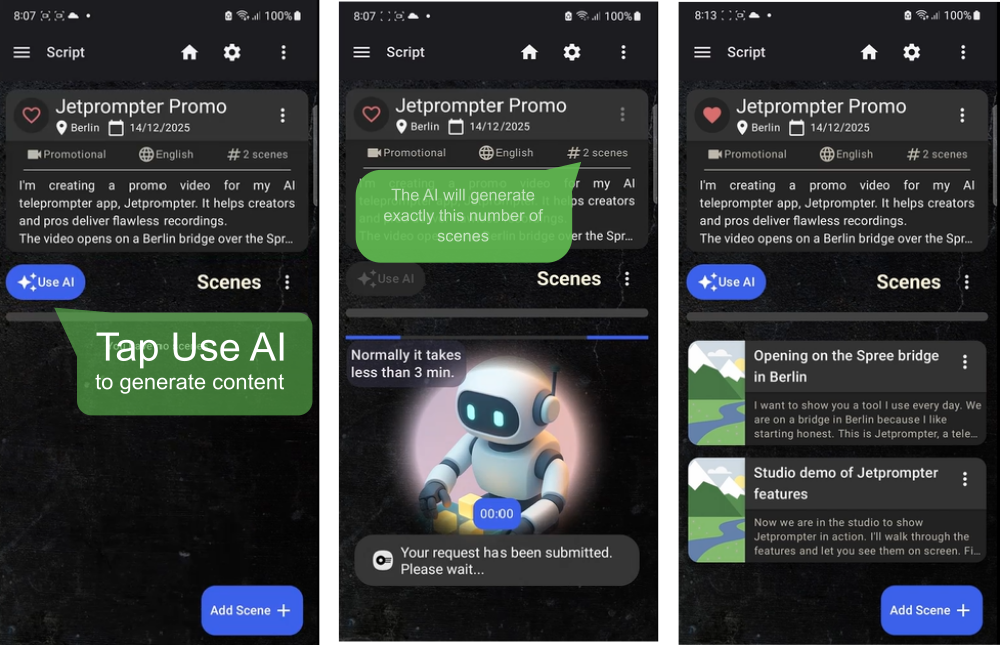
Note: The process may take up to 3 minutes if you have many scenes or have enabled Websearch option.
Editing scenes
Slide the scene card to the right and tap the 'Edit' button.
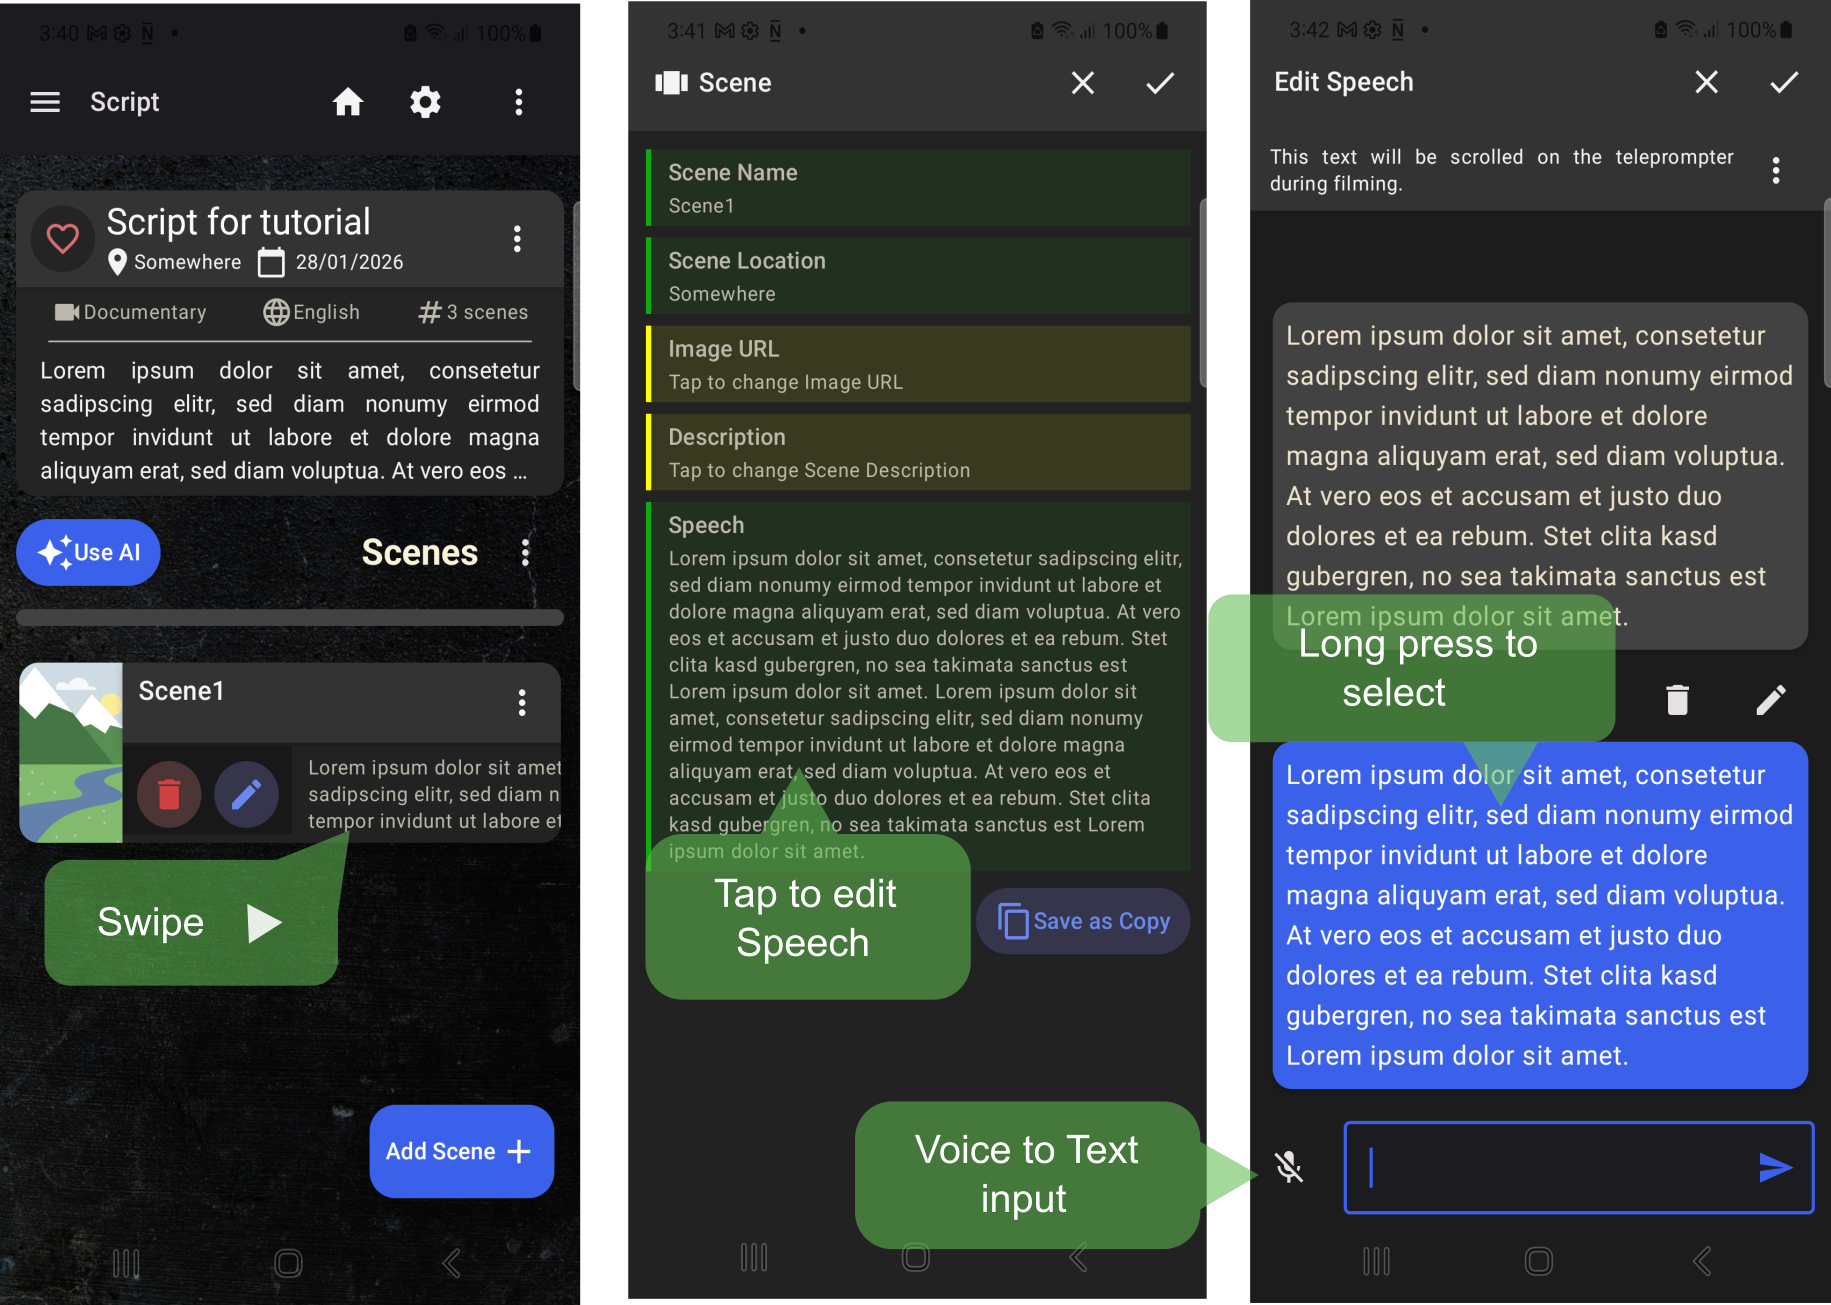
You can manually modify any details of the scene. Use the built-in editor to write your speech. If your text contains new line characters, they will be split into separate speech blocks.
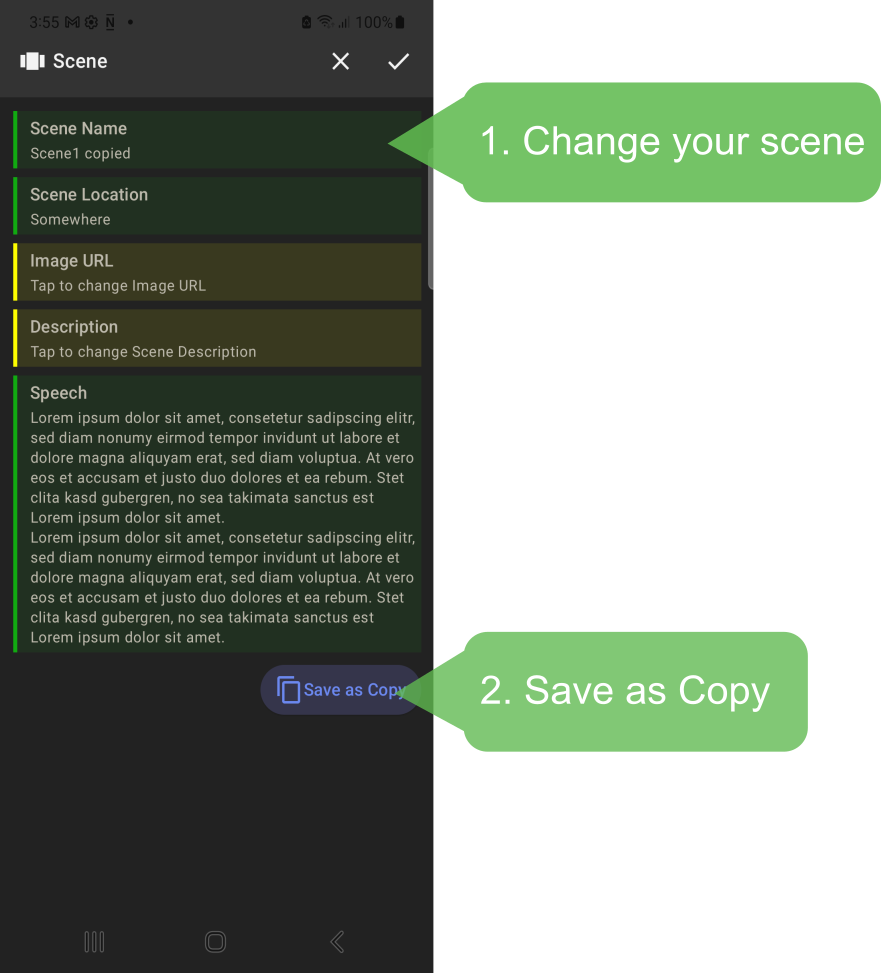
Duplicating a scene
Sometimes it's useful to make a copy of the current scene.
Reordering scenes
You can change the order of your scenes at any time. Simply drag and drop the scene card by holding the avatar icon on the left side. Watch a quick demo at 2:11 in the tutorial video to see how it's done.
Add scenes manually
You can add a scene manually at any time by tapping the plus button (FAB) on the 'Scene List' page. Provide meta information as needed. Most fields are optional.
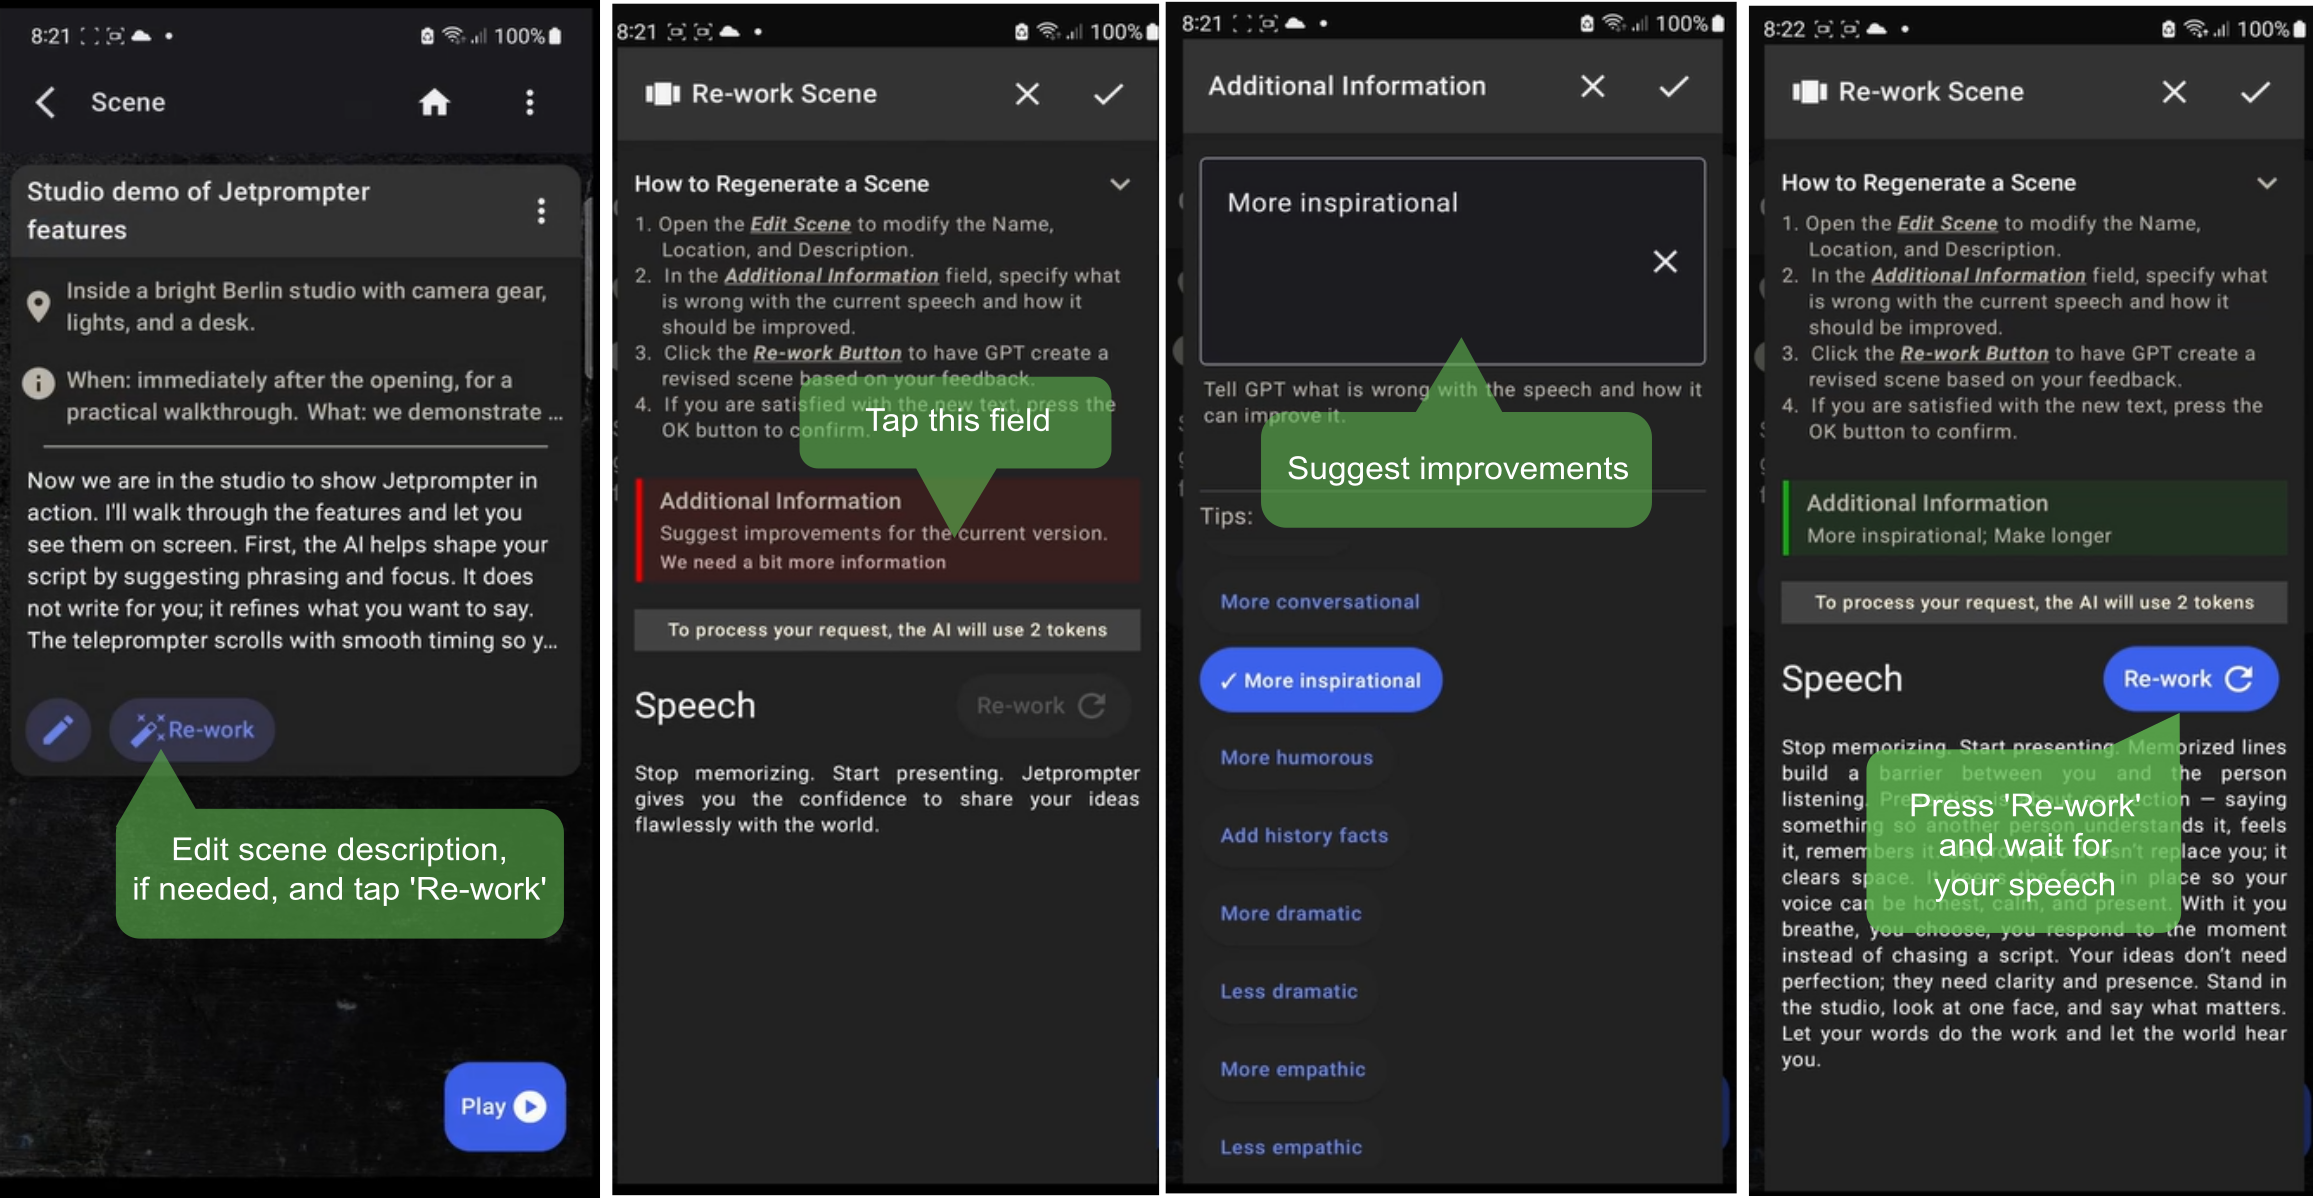
Use AI to rework your speech
Sometimes AI-generated text needs refinement. In this case, use the 'Rework with AI' tool. Provide guidance on what to improve, then tap 'Rework' button to generate a new version.
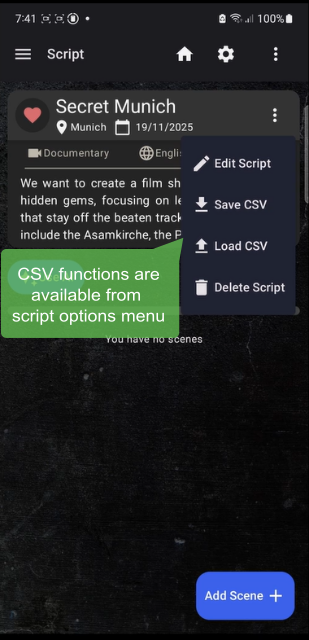
Import/Export CSV
Pro users can export their entire scene list to a CSV file. This is useful for backing up your script, sharing it with colleagues or editing it on a PC. Any edited CSV file can be imported back into the app later, even on a different device.
Processing CSV on your computer
Instead of general CSV editors, use our specialized 'CSV Editor' tool at jetprompter.com. It's designed specifically to recognize JetPrompter's CSV format. Available to all users since version 4.8, this tool lets you import, export, and edit CSV files. You can modify smartphone-created scripts or build new ones on PC for use on your phone later.
Follow these steps to edit your scripts using the CSV Editor:
- Save the CSV file from your device as described in the "Import/Export CSV" section, then copy the CSV file to your PC.
- Go to the CSV Editor on jetprompter.com
- Press the "Import CSV" button and select the CSV file you just copied. The script and its scenes will be loaded from the file.
- Make your edits to the script, scenes, delete scenes, or re-order scenes as needed.
- Click the "Export CSV" button. The new CSV file will be saved to your Downloads folder.
- Copy the new CSV file back to your device.
- Go to the "Script details page" on your device and select "Import CSV". Choose the newly copied CSV file to complete the update.
Play the scene
Tap the 'Play' button to open the 'Prompter' window.
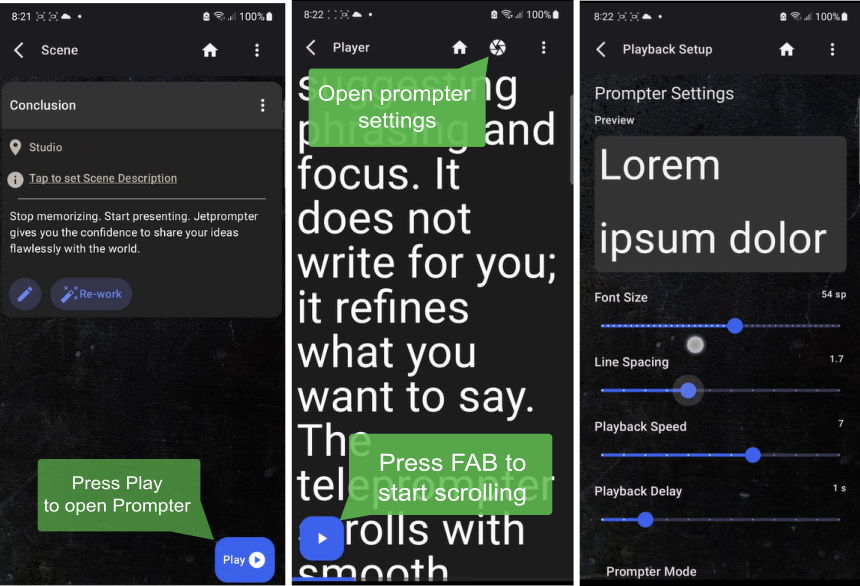
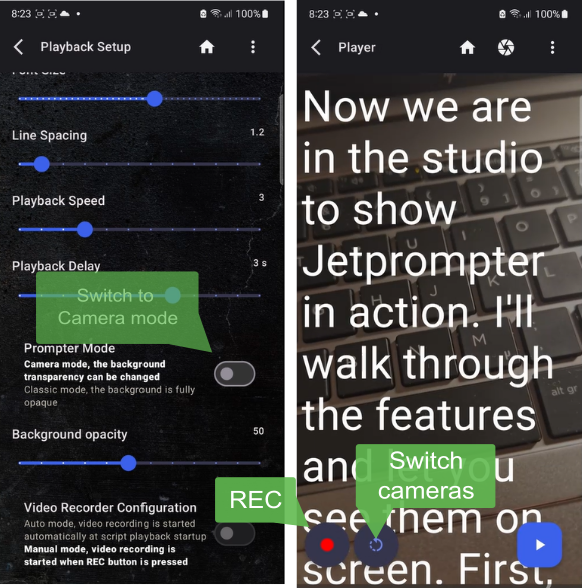
Prompter settings
You can adjust the font size, line spacing, and playback speed from the 'Playback Setup' page.
Camera mode
To record the video directly, switch to 'Camera Mode' to overlay your script on the smartphone's camera feed.
Web Application
Sign-in
To get started, press the Login button located at the top right corner of the screen.
For the best experience, use the "Sign in with Google" authentication method. This ensures you are signed into the same workspace as your mobile device, keeping all your projects in one place.
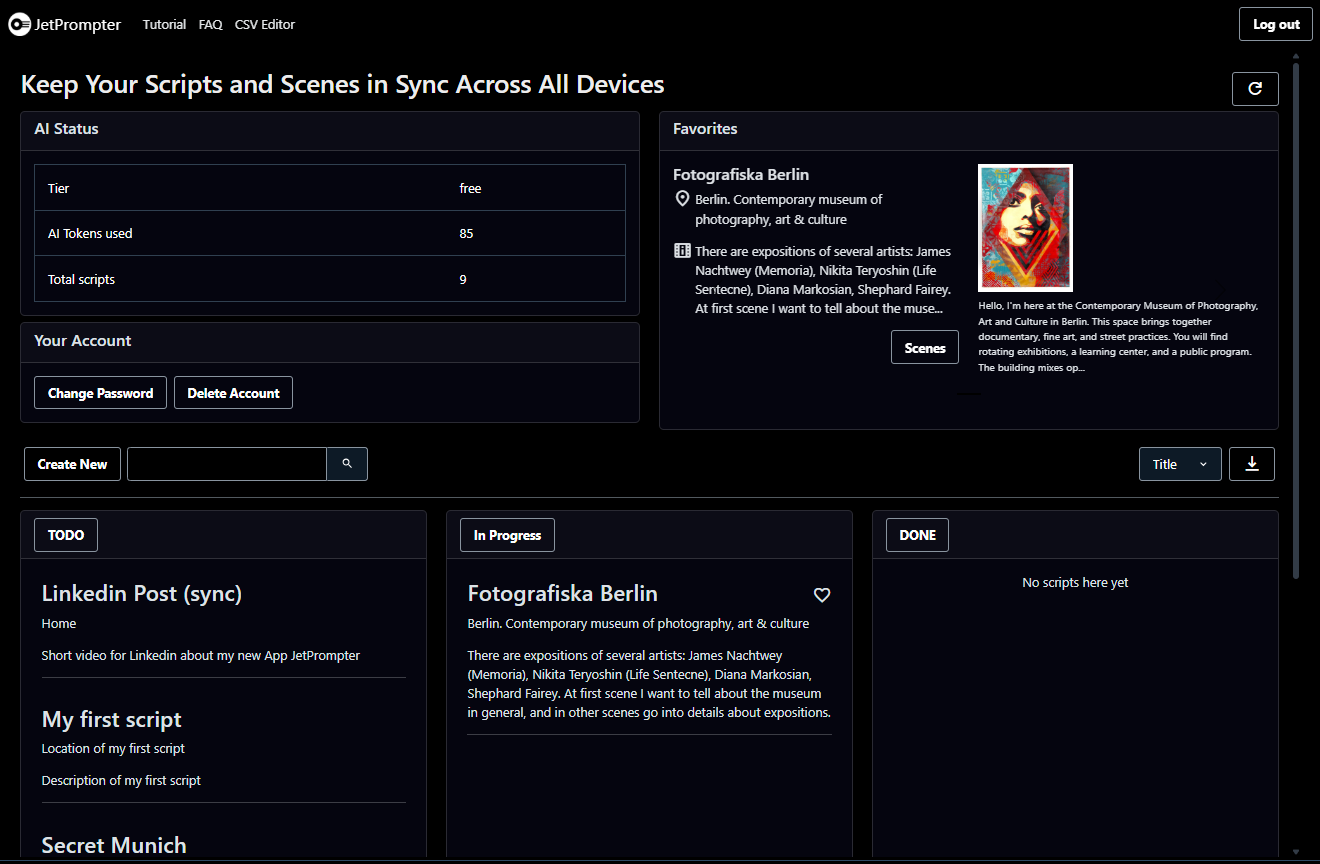
Dashboard
Once signed in, you will see the main dashboard (see picture below). This is your central hub for managing all your scripts.
Create a New Script
To create a new script, press the "Create New" button on the dashboard. A form will appear where you can fill out the script properties (see picture below).
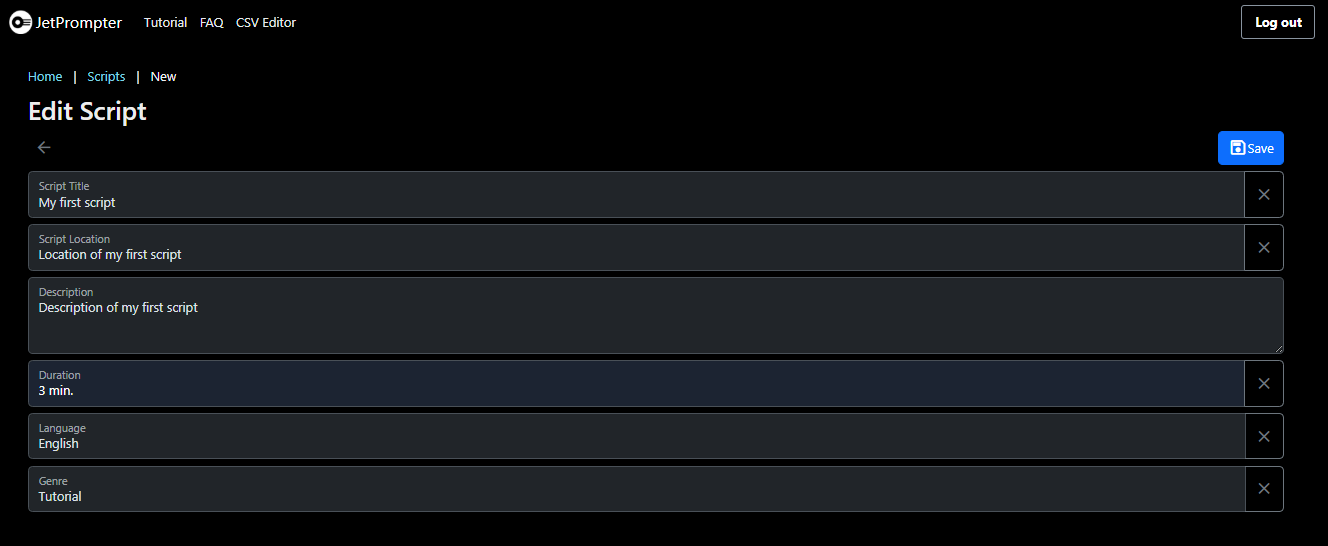
Once you have entered the details, press Save to create your script.
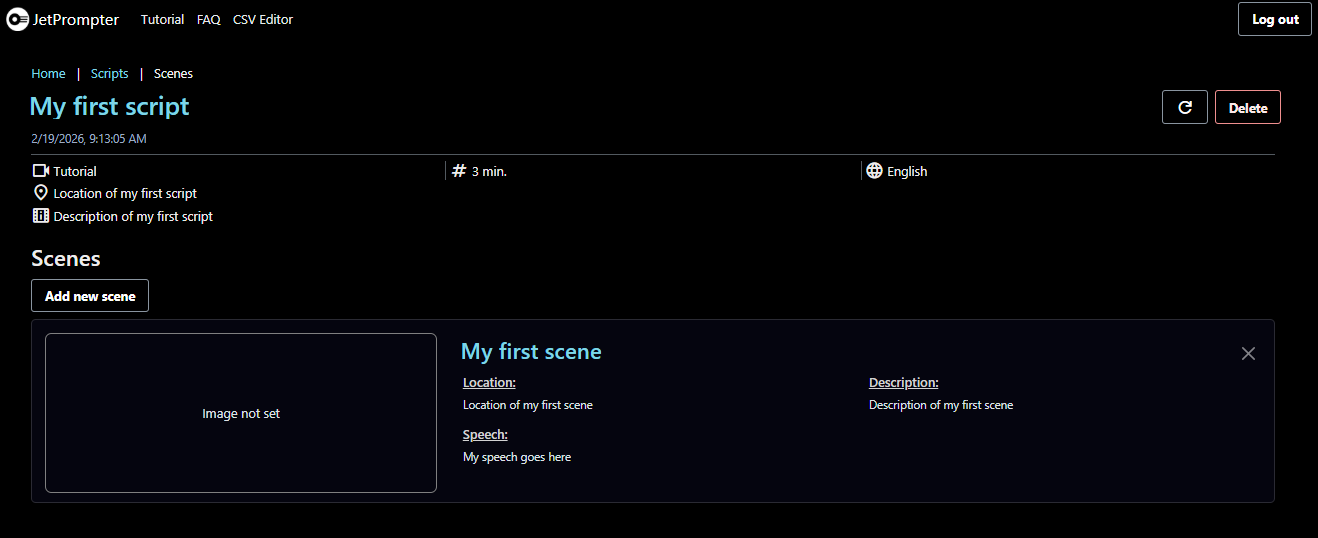
Navigate to Scenes
Your new script will appear as a card on the dashboard. To view or add scenes to this script, press the "Scenes" button on the script card. This will take you to the Scenes page for that specific script.
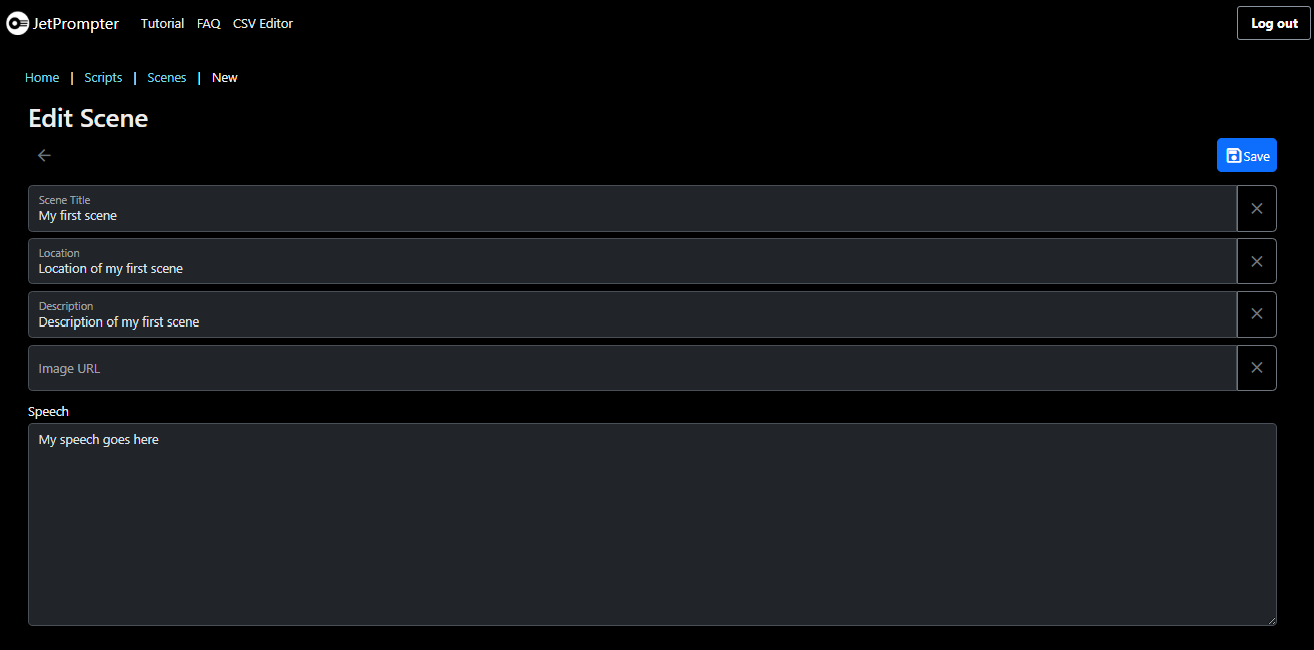
Create a New Scene
On the Scenes page, press the "Create New" button to add a scene to your script. Fill out the scene properties in the form provided, then click the "Save button" to store your changes.
Remote controllers
For handsfree controls you can also use the volume-up button to stop/start scrolling of the text. This works with most Bluetooth remotes emulating the volume key.